Showing posts with label repair. Show all posts

The Porch Lights

   Back on moving day, in our many futile attempts to get the couch into the house, we managed to break one of the outdoor light fixtures - what I will refer to from now on as the porch lights - right in half.  It was wonderful.  So there it hung with the base still attached to the house and the actual light and glass hanging by the wires.  That is not good, and it is certainly not safe.  So I decided to replace it.  It was the fixture by what I will call the front door - the door that leads to the living room - and I was going to replace just that one because I really liked the fixture that was outside of my back door (the one that you come to first and which leads to the kitchen).  It was one of those old jelly-jar style lights and I really liked the look of it.  But Jim got it into my head that I needed to do both so they both looked the same because you could see them both from the driveway, so it was off to Menards to get some replacements.
    First, let me give a note on the weather.  Normally this would have been my Saturday project, but because it was supposed to be rain turning to snow and then continuing to snow for most of the day Saturday, I decided to put off the work until Sunday, since I thought today was supposed to be nice.  Well, it was "nice" if 20° and cloudy is what you consider "nice."  I don't mind weather like that, but then you are outside for hours holding metal tools in gloveless hands, then it gets awfully cold awfully quick.  But it is done.  That being said, let's get started.  Here is what I was going to be installing today, twice over:

Colonial-style...that's ritzy, I know.
So I decided to start with the back door.  Let's take a look at the scene as it stood before we got started.
The scene, including toolbox, snow, and super slippery step.
Up close.  I really liked the look of this light.  Notice the pretty bow.  And yes, I know the paint is peeling...
      I had the switch to the light and the breaker turned off, because I don't know if you knew this but I am totally afraid of working with electricity.  I began by taking off the pretty green bow, and then the lens on the light.  Normally these are held on by having a ridge on the lens, and two or three screws that screw in under the ridge to keep everything in place.  Little did I know as I loosened the first screw, but this one was only held on by one.  I was amazed that the lens did not break when it dropped about 8 feet to the freezing concrete below.  They don't make things like they used to.  Next I removed the screws that held the base on. 

The dark area behind the mounting bracket is not a hold, it is just unpainted, ancient wood.
   The instructions for mounting the new lights had talked a lot about mounting the brackets to the existing electrical box, so I sort of had to make due when I pulled my old porch light off and found that it was connected directly to the wood siding.  So I did the same with the new one, ditching the included screws and just using some wood screws I had in my toolbox.  Once I got that mounted I stripped the wires, which were really old and were not even braided.  They also seemed to be encased in cardboard instead of plastic like modern romex.  You can see the mounting bracket attached and wires stripped in the next photo.

Black and white wires are hot, and the ground will attache to the green screw, which you are supposed to attach to the house ground, but in this case there is no house ground so it will just attach to the metal bracket.  The gold screws on the edges will be for mounting the actual light to.
So far so good.  Now was the time to attach the wires, and it was pretty easy because the new light came with screw-type electrical connectors.  So I just screwed them together and put the ground around the green screw.  The problem that I had was that for some reason the black wired connected really easily, but the white wouldn't grab the wire from the light.  I had to try it three or four times before it finally held.  All I had to do once the wires were connected was to wedge the wires inside the base of the fixture (no easy feat since there was no added space in the form of an electrical box) and attach the fixture with the little gold fasteners from the photo above.  Once the light bulb went in it was time to test it.  I touched nothing but the switch and made sure to be wearing rubber soled shoes.

Ready to test.  It doesn't look bad as far as I am concerned.
It works!
All done.  A little high because the old fixture hung downward, but it looks fine to me.
      Everything worked just fine, and to be honest I was just a little surprised that was the case.  I was sort of just waiting for the "ZAP!" and nothing working anymore.  But when the breaker and switch were turned on there was light.  I put the top on the light fixture, and was all done.  Except one thing.  I need to caulk around the base of the fixture to help keep water and ice out from where the electric connections are, but you can't caulk at 20° so that part will have to wait until the temperature is a little warmer for a day.  It should be watertight for now as it is generally protected from the worst of winter winds and precipitation.
     Now, if the light doesn't look the same as it did on the box, there is a reason for that.  There is a decorative, long, slender piece that hangs down below the light that is a sort of optional add-on, which I chose not to add on.  I could, and I have kept them in case we ever want to, but for now I did the optional installation.  So that accounts for the difference in look.
     With the first light on and working, it was time to move to the light by the front door.  This was the broken one.

There are so many things things that are wrong with this picture, mostly the ugliness and brokenonsity.  Yeah, I just made that word up.
I had problems with this light immediately.  I couldn't figure out how to get the glass off so I could extract the light bulb.  So I went ahead and just started by removing the entire fixture from the wall.  This, too , was harder than expected because when it was installed it had been caulked like it was supposed to have been, so I had to scrape and remove a lot of painted caulk.  Once it came off I figured out how to remove the light bulb, and I was happy to see that there was an electrical box hidden behind where the fixture was located.  The blurry picture below was taken before I even snipped the existing wires.

This is roughly what one should see behind their fixtures.
Once I got the light removed, I snipped the wires and began to take apart some of the existing mounting hardware from the inside of the electrical box, and to clean out all the pine needles, cobwebs, etc.

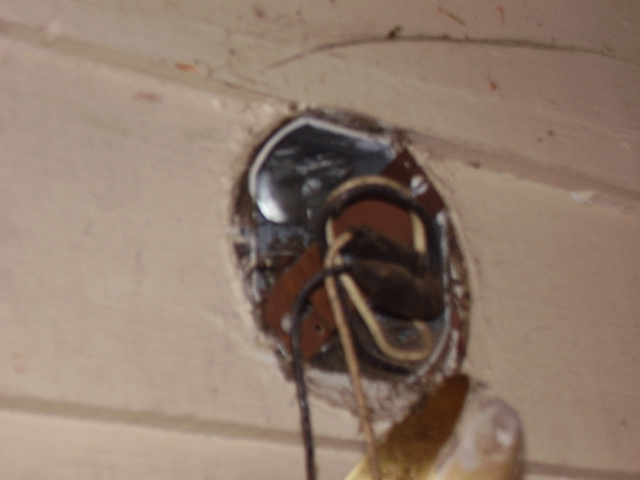
Traditional black and white wires can be seen here.  The building ground in the v-hook looking thing at the bottom-left of the box.  It would be looped around one of the new bracket mounting screws.
     Once the existing stuff was all gone, I went ahead and mounted the bracket for the new light to the box using the hardware they gave me, because there was actually a box.  I don't strip the wires until the last minute if I can get away with it, because even with all the connections severed I still want as little exposed wiring as I can until the last possible minute.

The box with the new mounting hardware installed and wires stripped.
Once the wires were stripped it was as easy as attaching black to black, white to white, and the bare ground wire to the green ground screw.  I then left the light dangling from its wires so I could take a photo, because I am classy like that.

Almost looks like a professional install, doesn't it?  Just wait, it will get a lot more homespun real quick.
      Everything was going generally swimmingly up until this point.  This is where the problems began.  The biggest problem that I had was that the electrical box was mounted in such a way that the top of the box was even with the bottom of a course of siding.  This was apparently no problem with the old fixture.  It was, however, a problem for me, because my light was a little bigger around and couldn't fit in the space provided with the way the screw holes and mounting hardware were designed.  So I had to shave away some of the siding above the light to get it to fit, and I didn't have a saw.  So I was stuck with using a cold chisel.

The picture is fuzzy, but that is okay because my chisel job really looked bad.  It will be alright, however, because it will ultimately by covered by fixture and caulk and painted.
Once the wood was hollowed out, I was ready to try mounting the light again.  I actually had a lot more trouble getting it mounted with with the system and hardware that the manufacturer provided.  I had to try a bunch of different methods and hardware before I could finally get it to stay like it is supposed to stay.  I will actually feel much better once it is caulked because this installation has a bit of a gap, and plus the caulk will help hold the fixture in place.  In the meantime, however, it is still not going to go anywhere.

     So another successful home repair project for me, at least for now.  No zapping, both lights work, and the house hasn't burned down so far.  I will definitely caulk around both fixtures as soon as the weather will allow because I can envision all sorts of ice forming around electrical connections, or tons of bugs and animals going in there because it is sheltered.  But for the most part we are done and successful.  Now we can be safe and welcoming in the nighttime, and look relatively good doing it.  I think I have earned myself a cookie.

Fix It Saturday

    The general program in my life since I have bought the house has been that I am not to sit down on the couch after work until I have completed one project.  That enables me to get a lot of small things done during the week, which leaves a lot of the big or bigger or potentially more time consuming projects for the weekend.  This weekend, my big project was to put new lights on the outside of the house.  But the weather was supposed to be bad on Saturday (and it was, at least in the afternoon with heavy, wet snow) but today was supposed to be at least precipitation-free.  So I did a bunch of small projects on Saturday, but I didn't want to go into a ton of pictures and detail about them.  So here they are in sort of list and short blurb form with just a couple of pictures of each.

- I strung a cord for my engine block heater.  My car is a pretty nice car, but it is a stick shift and sometimes it takes a long time on cold days for the engine to heat up and then to heat up the transmission fluid and parts so I can go.  So I am determined to use my engine block heater this winter to cut down my warm-up time in the morning.  I once read an article about engine block heaters that said they heat up your engine over 30° in the first two hours they run, and then less than 1° per hour for the rest of the time, so I figured that I would hook it up to a timer that you just feed electricity to the thing for a couple of hours.  Since there is no outdoor outlet on that side of the garage, and I had to factor in the timer, I ran an extension cord from an indoor outlet across the garage, through a hole drilled in a window sash on the lean-to, and curled up on the side of the garage.  The electricity will click on every morning, whether or not the heater is plugged in.  Should work pretty slick, even if it isn't the most professional of installs.  I used the little clamps they use to mount coaxial cable to the side of the house to keep the cord in place.

- I put some hardware on the garage windows.  I came to discover the other day that two of the windows in my garage were just sort of held in place with some bent nails and hopes and dreams, and the wind would blow them in and out about an inch or so.  But I thought it would be cool if they could be held in place a little better, AND be able to open should we desire.  So I put some hinges and latches on them.  Not perfect but certainly functional.  That is the project of which I am most proud of.  Well, second most proud of.


The windows that were to be replaced
The flash didn't go off, but as you can see the windows are hinged inward now - because I couldn't hinge them outward due to the way the trim was installed.  No big deal.


Looks normal now, but it didn't before.
-  I reversed the kitchen faucet.  When the home inspector came through the house to do his work before I bought the place, the first thing that he told me was that the faucet of the kitchen sink was on backward.  And it was.  The handle faced the wall/window, and you had to pull the handle towards you and down instead of pushing it up and away to get the water to come on.  The hot and cold were on the correct sides, however, which mean that I couldn't just turn the handle around, I had to disconnect the water lines and unmount the entire faucet to turn it around.  And I did it with no troubles and no leaks.  I don't know who put that in, or why they thought the manufacturer would put a mounting screw on the front of the faucet and their logo (it's a Moen faucet, just in case you were wondering) on the back, but they couldn't have been more wrong.  So now it is fixed and it looks right and most importantly is working like it should.  Thank goodness I didn't have to take the faucet itself apart - that would have been disaster


- I did the same thing with the handle on the storm door.  They did the same thing here, so I assume that the handman they were using was a little dyslexic.  From the outside, you had to lift UP on the handle to open the door, which is very unnatural and difficult with your hands full.  So that is fixed up too and all is right in the world.

-  I hung some shelf brackets in the garage.  You don't get a picture of that one, because it is ridiculously easy, but I should note that there is no shelf on the brackets.  Traci's snowboard lives on them, upside down of course so the wax doesn't get messed up.  It looks good on the wall with the cross-country skis and snowshoes.

So those were my today projects, and I am pretty proud of where I got for a day that was mostly rain and snowy.  A lot of little things for sure, but they are done and out of the way, and they really do make a big difference.  Check in tomorrow to see how my first attempts at playing with electricity went.

Growing Up

     When I was not too much younger than I am now - just a couple of years - I used to silently roll my eyes at my mom as she was taking hundreds of paint samples around with her and viewing them in every conceiveable light and season as she was picking out siding and trim for her new house.  And I used to give dirty glances at the couple that was standing in the lighting section at Menards or Home Depot discussing endlessly exctly which outdoor lights they are going to put on their home.
     Well, I have to admit that I was faced with that exact same situation last night at Menards, and I would like to think that I did pretty well as compared with some.  I was momentarily stunned by the giant wall of outdoor light fixtures that stood before me and I immediately thought to myself "Holy shit how I am I supposed to pick one from all these."  But I was quickly able to discard many as options because they were not the right type or they were way over the top gaudy to me.  After some quick discussion, and a question to the clerk (the pair I really liked the most were on sale but were a closeout and only available in white I was told, and I did not want white light fixtures on my brown on brown house) we walked out with ones that we were able to agree on.  Nice and easy as far as the fixtures go.  And Traci was able to settle on a paint color for the basement without having to lug around samples for a year, so I am really proud of her.
     On Saturday, I am going to attempt to install said light fixtures, as long as I have figured out which breakers are which (the box is brand new but not labeled).  I know how electricity works, and I know that I can just turn off the switch and I won't get zapped, but quite honestly I am scared to death to work on anything electrical.  When everything you touch turns to shit, you very easily envision yourself lying on the ground convulsing with a wire in your hand.  So the breakers will have to be off.  Besides, they need to be labeled anyway, right?  So look for that this weekend.  And be careful at the home improvement store: it might get you.

The Pocket Door

    I suppose that you could call this my very first home improvement project in my new house.  Replacing nails on the board that boards up the broken window on the dilapidated lean-to attached to my garage doesn't really count, but I do think this does.  While Traci worked on unpacking the last of the pictures and knick knacks (oh, and finding the mysterious lost box of kitchen items - which she did) I tasked myself with fixing two doors in the basement.  See, the basement is partially furnished, with a living room and a bathroom and an office (read bedroom that can't legally be called a bedroom).  There is a narrow hallway that connects the living room to the bedroom and on one side of that hallway there is a giant closet that was missing a door, and on the other side was the bathroom, accessed through a pocket door that had come off of its track and was stuck in a sort of half-closed position.
    Now pocket doors are a wonderful thing.  Instead of swining open like a conventional door, they slide into the wall and allow one to put a door in places where a door might not always be able to go.  So that is what I was dealing with in this situation, only it had some twists.  First of all, it was an ancient and heavy pocket door, that wasn't as well engineered as current ones generally are.  Second, it was in a very home-spun wall that didn't make a whole lot of sense.  But we will deal with that a little later.
     So I decided that I would begin with the closet door, because it was going to be the easiest I knew and I figured that I needed a little bit of a boost before I began.  So I grabbed the door and walked it over to the closet and stuck it in and it went wonderfully and perfectly.  I was a success at my first bit of the project.  That was cool.  Both doors slid past one another like butter and it was even on the right way.  Now on to the pocket door.
     I knew that the pocket door was going to be a lot, lot harder.  I messed with it a little while and looked into the situation.  There was a track that was installed WAY UP in the ceiling for the door to ride on, and there were some sketchy looking wheeled hardware that ran on it.  The problems that I immediately saw were two: 1.) I had to pull the door out of its normal line of travel in order to get the wheels back on the track, and 2.) I couldn't get my hands on either side of the door to remove it from its spot.  See, the door, when closed, was excatly the same size as the opening it was meant to cover.  So I couldn't get my giant Mickey Mouse hands around it to pull it outward from the bathroom.  Wonderful.  My gaze immediately turned towards the wall.
     It was going to have to go.  At least part of it was.  I began with the trim around the door and along the section of wall in the hallway.  I gently pried around the areas where it was nailed in and it began to give way in a couple of different ways.  Some of it came out like I wanted it to, where the nail came with the trim.  Good.  In some instances, the nails actually pulled through the trim and I had to remove them from the wall behind.  Anyway, what I found was not encouraging. 


This is the inside of our wall.  As you can see it is not a pretty sight.
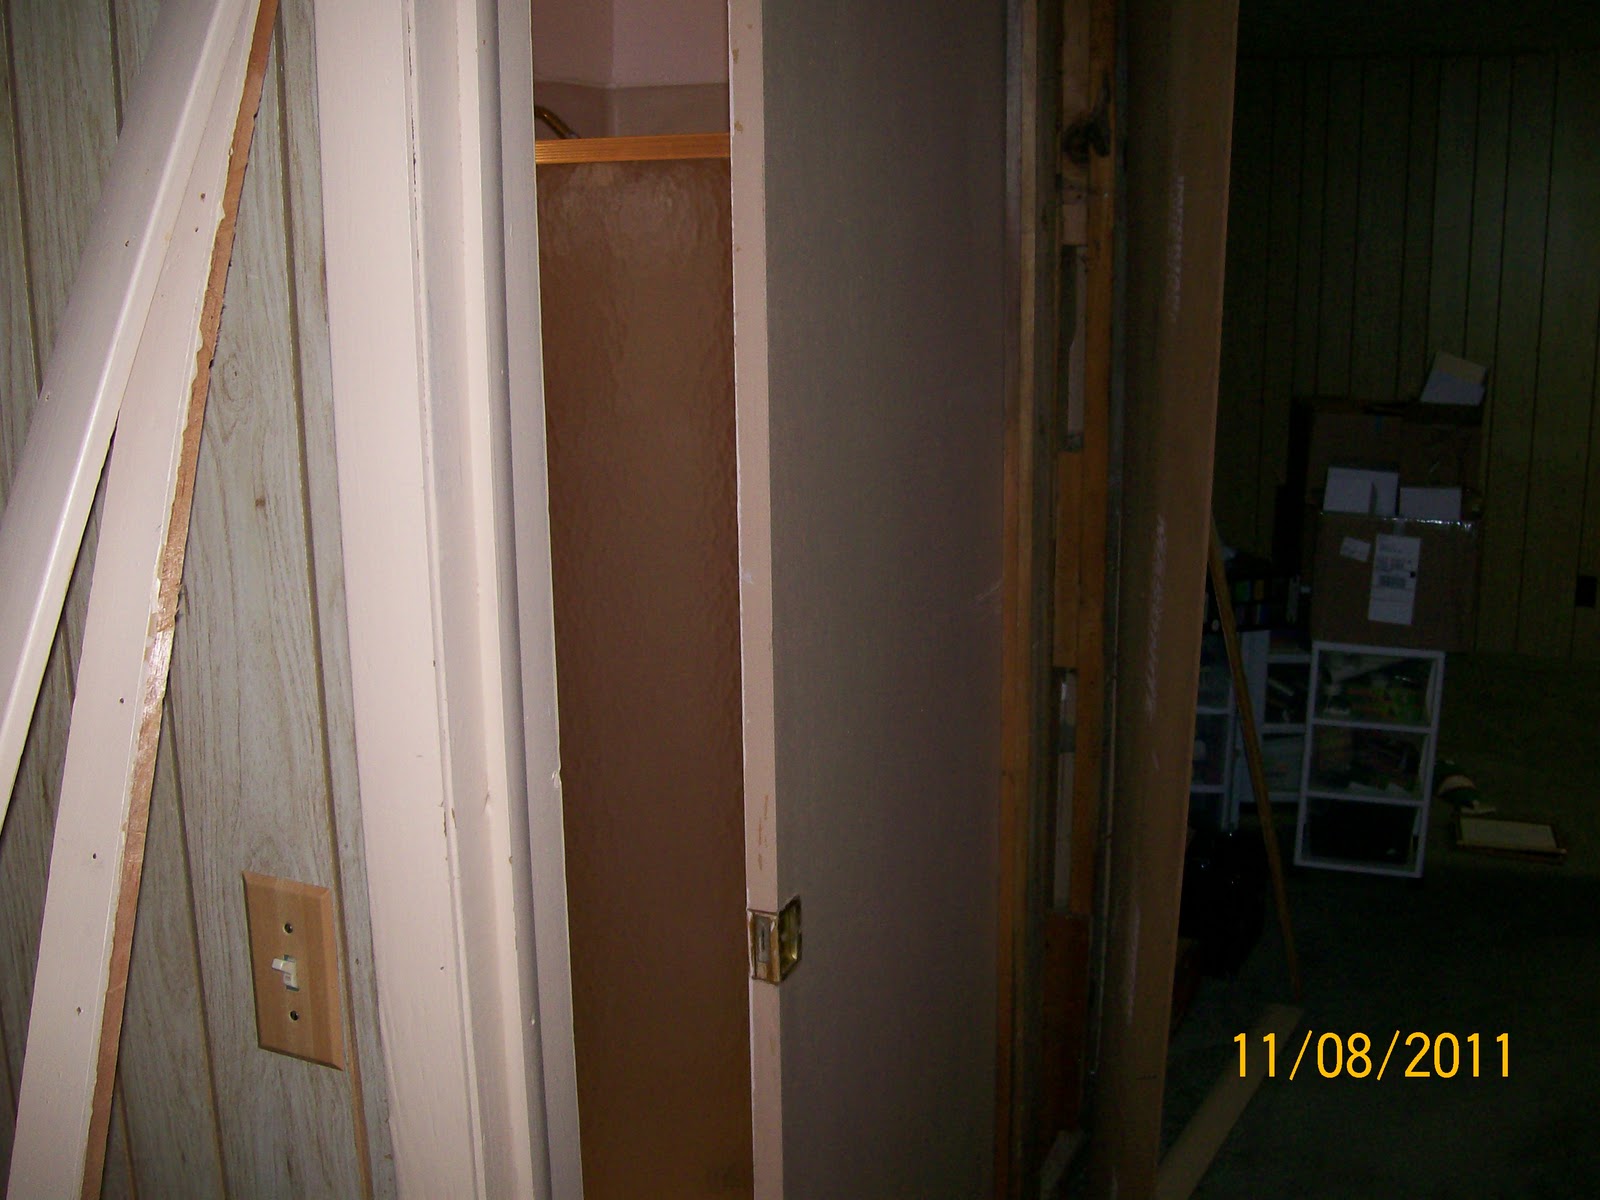
   Yeah, it is. not great.  You can see the shower to the left, and the things sitting in the basement to the right.  The "bedroom" is behind the camera.  The paneling is pulled away from the wall and you can see all sorts of supports and studs inside the wall, none of which I will point out are 2x4s 16" on center.  But I digress.  That is the area in which the pocket door slides, and I had hoped to be able to pull it out there in order to get it on its track, but no suck luck.  There are too many supports, etc.  So I decided I need to deconstruct a little more.  The painted trim piece in the foreground would be the next to go.  In the next two photos you can see the offending door, now removed from its pocket, and a view of some of the trim pieces scattered around.
The offending door, now removed and put in the hallway.  Just off the top of the door is the sketchy hardware that is used to hold up the door and allow it to slide along the track.
You can see all the assorted trim pieces lying about the bathroom.  Notice too the super cool decor in the bathroom.  Lots of off-pink, if that's a color.
   Well it went, and the structural support part of the wall behind it too.  I use the term structural support loosely because it wasn't supporting anything more than the paneling and trim pieces, but it was still supporting something. So that had to come off too.  All so I could get the stupid door on the offending track that was way, WAY to high up in the wall.  Wanna see a picture?
Look at how far up into the wall this track is mounted.  How the hell was I supposed to get the door up in there.
     The good news, however, is that through perserverence and a large amount of luck I was able to get the door mounted onto the track.  I am not totally sure that it is mounted correctly, but it seemed to be the only way that it could go on, and it is traveling somewhat smoothly and is working.  So that was the good news.
The freshly remounted bathroom pocket door.

The door in a working condition.
 Now all that was left to do was to go ahead and put the trim pieces back on, oh, and replace the parts of the wall that I had to remove. 
In the process.  You can see that the trim pieces along the ceiling and the right hand side of the door have yet to be re-installed, but the trim along the floor (below the bottom of the picture) and at the end of the hallway are back.
All done.
    So what did I learn from my little project?  Let me put it in list for for you:

1.)  I am going to hate that pocket door, since I am pretty sure that it is going to fall off again sometime next week.

2.)  Always plan for twice the amount of time that you think you will need for any project.

3.)  There is a critical shortage of nails in my house.

4.)  I am going to find messed up stuff every time I do a home improvement project in this house.  I am pretty sure.

I also learned one bonus thing.  I was in the unfinished part of the basement using the concrete floor to straighten some nails (see #3 above) when I saw this:
The leg of the laundry tub.  That is the sump at left, with the ancient galvenized pipe.
That's right, one of the legs of the laundry tub in our basement is being held up by a hinge.  Bold strategy.  Luckily it is too rusted and painted to ever actually swing, plus it is mounted to the floor somehow, so I am just not going to mess with it.  You have to pick your battles sometimes, and this one just isn't worth the fight.  But the good news, however, is that things are fixed up in terms of the door.  I tested it this morning and it works just fine, you just have to be a little gentile with it.  So I term it a success.  This weekend we try again to get the couch in the house.  Now that should be a trip.