Back on
moving day, in our many futile attempts to get the couch into the house, we managed to break one of the outdoor light fixtures - what I will refer to from now on as the porch lights - right in half. It was wonderful. So there it hung with the base still attached to the house and the actual light and glass hanging by the wires. That is not good, and it is certainly not safe. So I decided to replace it. It was the fixture by what I will call the front door - the door that leads to the living room - and I was going to replace just that one because I really liked the fixture that was outside of my back door (the one that you come to first and which leads to the kitchen). It was one of those old jelly-jar style lights and I really liked the look of it. But Jim got it into my head that I needed to do both so they both looked the same because you could see them both from the driveway, so it was off to Menards to get some replacements.
First, let me give a note on the weather. Normally this would have been my Saturday project, but because it was supposed to be rain turning to snow and then continuing to snow for most of the day Saturday, I decided to put off the work until Sunday, since I thought today was supposed to be nice. Well, it was "nice" if 20° and cloudy is what you consider "nice." I don't mind weather like that, but then you are outside for hours holding metal tools in gloveless hands, then it gets awfully cold awfully quick. But it is done. That being said, let's get started. Here is what I was going to be installing today, twice over:
 |
| Colonial-style...that's ritzy, I know. |
So I decided to start with the back door. Let's take a look at the scene as it stood before we got started.
 |
| The scene, including toolbox, snow, and super slippery step. |
 |
| Up close. I really liked the look of this light. Notice the pretty bow. And yes, I know the paint is peeling... |
I had the switch to the light and the breaker turned off, because I don't know if you knew this but I am totally afraid of working with electricity. I began by taking off the pretty green bow, and then the lens on the light. Normally these are held on by having a ridge on the lens, and two or three screws that screw in under the ridge to keep everything in place. Little did I know as I loosened the first screw, but this one was only held on by one. I was amazed that the lens did not break when it dropped about 8 feet to the freezing concrete below. They don't make things like they used to. Next I removed the screws that held the base on.
 |
| The dark area behind the mounting bracket is not a hold, it is just unpainted, ancient wood. |
The instructions for mounting the new lights had talked a lot about mounting the brackets to the existing electrical box, so I sort of had to make due when I pulled my old porch light off and found that it was connected directly to the wood siding. So I did the same with the new one, ditching the included screws and just using some wood screws I had in my toolbox. Once I got that mounted I stripped the wires, which were really old and were not even braided. They also seemed to be encased in cardboard instead of plastic like modern romex. You can see the mounting bracket attached and wires stripped in the next photo.
 |
| Black and white wires are hot, and the ground will attache to the green screw, which you are supposed to attach to the house ground, but in this case there is no house ground so it will just attach to the metal bracket. The gold screws on the edges will be for mounting the actual light to. |
So far so good. Now was the time to attach the wires, and it was pretty easy because the new light came with screw-type electrical connectors. So I just screwed them together and put the ground around the green screw. The problem that I had was that for some reason the black wired connected really easily, but the white wouldn't grab the wire from the light. I had to try it three or four times before it finally held. All I had to do once the wires were connected was to wedge the wires inside the base of the fixture (no easy feat since there was no added space in the form of an electrical box) and attach the fixture with the little gold fasteners from the photo above. Once the light bulb went in it was time to test it. I touched nothing but the switch and made sure to be wearing rubber soled shoes.
 |
| Ready to test. It doesn't look bad as far as I am concerned. |
 |
| It works! |
 |
| All done. A little high because the old fixture hung downward, but it looks fine to me. |
Everything worked just fine, and to be honest I was just a little surprised that was the case. I was sort of just waiting for the "ZAP!" and nothing working anymore. But when the breaker and switch were turned on there was light. I put the top on the light fixture, and was all done. Except one thing. I need to caulk around the base of the fixture to help keep water and ice out from where the electric connections are, but you can't caulk at 20° so that part will have to wait until the temperature is a little warmer for a day. It should be watertight for now as it is generally protected from the worst of winter winds and precipitation.
Now, if the light doesn't look the same as it did on the box, there is a reason for that. There is a decorative, long, slender piece that hangs down below the light that is a sort of optional add-on, which I chose not to add on. I could, and I have kept them in case we ever want to, but for now I did the optional installation. So that accounts for the difference in look.
With the first light on and working, it was time to move to the light by the front door. This was the broken one.
 |
| There are so many things things that are wrong with this picture, mostly the ugliness and brokenonsity. Yeah, I just made that word up. |
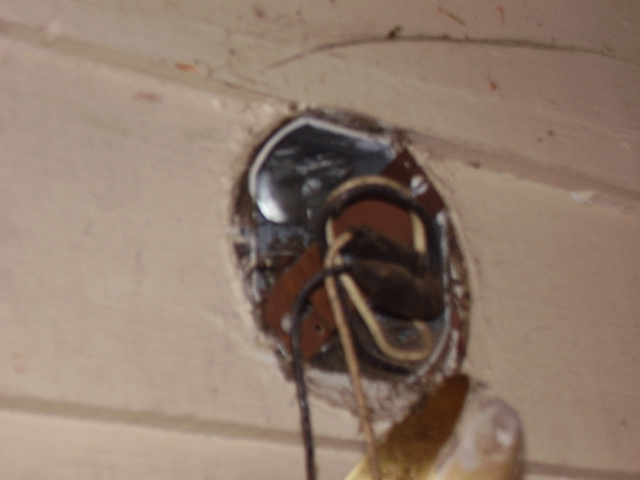
I had problems with this light immediately. I couldn't figure out how to get the glass off so I could extract the light bulb. So I went ahead and just started by removing the entire fixture from the wall. This, too , was harder than expected because when it was installed it had been caulked like it was supposed to have been, so I had to scrape and remove a lot of painted caulk. Once it came off I figured out how to remove the light bulb, and I was happy to see that there was an electrical box hidden behind where the fixture was located. The blurry picture below was taken before I even snipped the existing wires.
 |
| This is roughly what one should see behind their fixtures. |
Once I got the light removed, I snipped the wires and began to take apart some of the existing mounting hardware from the inside of the electrical box, and to clean out all the pine needles, cobwebs, etc.
 |
| Traditional black and white wires can be seen here. The building ground in the v-hook looking thing at the bottom-left of the box. It would be looped around one of the new bracket mounting screws. |
Once the existing stuff was all gone, I went ahead and mounted the bracket for the new light to the box using the hardware they gave me, because there was actually a box. I don't strip the wires until the last minute if I can get away with it, because even with all the connections severed I still want as little exposed wiring as I can until the last possible minute.
 |
| The box with the new mounting hardware installed and wires stripped. |
Once the wires were stripped it was as easy as attaching black to black, white to white, and the bare ground wire to the green ground screw. I then left the light dangling from its wires so I could take a photo, because I am classy like that.
 |
| Almost looks like a professional install, doesn't it? Just wait, it will get a lot more homespun real quick. |
Everything was going generally swimmingly up until this point. This is where the problems began. The biggest problem that I had was that the electrical box was mounted in such a way that the top of the box was even with the bottom of a course of siding. This was apparently no problem with the old fixture. It was, however, a problem for me, because my light was a little bigger around and couldn't fit in the space provided with the way the screw holes and mounting hardware were designed. So I had to shave away some of the siding above the light to get it to fit, and I didn't have a saw. So I was stuck with using a cold chisel.
 |
| The picture is fuzzy, but that is okay because my chisel job really looked bad. It will be alright, however, because it will ultimately by covered by fixture and caulk and painted. |
Once the wood was hollowed out, I was ready to try mounting the light again. I actually had a lot more trouble getting it mounted with with the system and hardware that the manufacturer provided. I had to try a bunch of different methods and hardware before I could finally get it to stay like it is supposed to stay. I will actually feel much better once it is caulked because this installation has a bit of a gap, and plus the caulk will help hold the fixture in place. In the meantime, however, it is still not going to go anywhere.


So another successful home repair project for me, at least for now. No zapping, both lights work, and the house hasn't burned down so far. I will definitely caulk around both fixtures as soon as the weather will allow because I can envision all sorts of ice forming around electrical connections, or tons of bugs and animals going in there because it is sheltered. But for the most part we are done and successful. Now we can be safe and welcoming in the nighttime, and look relatively good doing it. I think I have earned myself a cookie.